Ad1

Wednesday 27 August 2014

Hyderabadi Chicken Biryani : Kacchi Murg Biryani


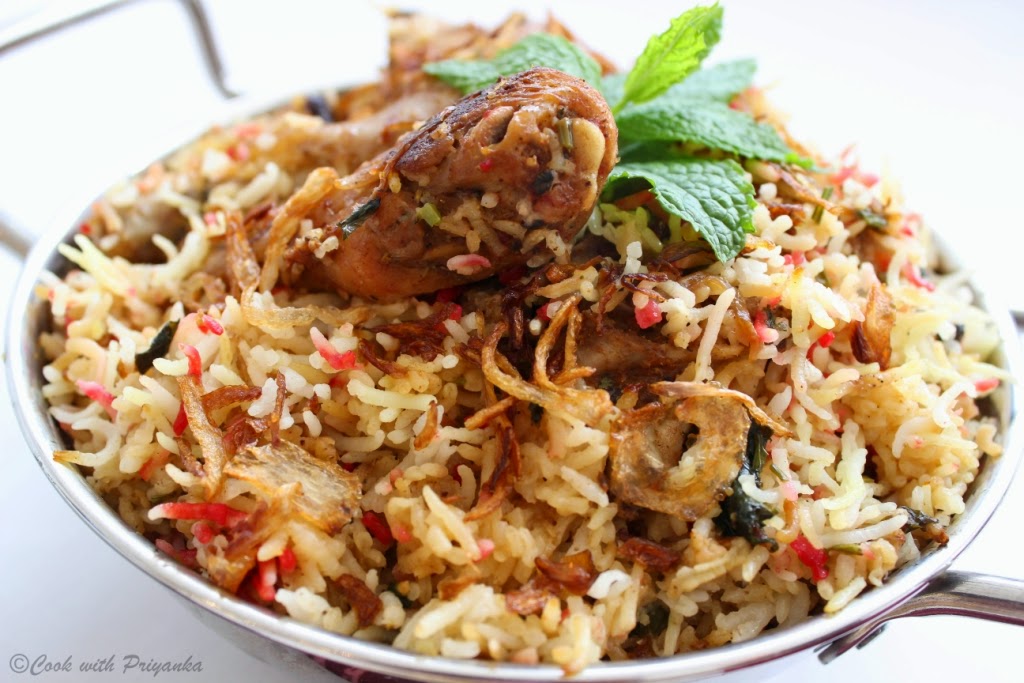
Hello everyone, today I have got you all a recipe of Hyderabadi Biryani. Its a world famous cuisine and very much delicious. Its one of my favourite food, I tasted it in Bangalore for the first time. Being from Northern Part of India (Uttar Pradesh), I always enjoyed Lucknowi Biryani or the Awadh Biryani. Its very much different from the Hyderabadi one. In Lucknowi biryani both rice and meat are cooked separately, then layered together and put on Dum. Where as Hyderabadi Biryani is Kacchi biryani, in which meat is marinated with yogurt and few spices and layered with partially cooked rice, sealed and cooked on low flame. Eventually both the things get cooked. 


Both the Biryanis have awesome flavours but Kacchi murg biryani is very common at my place. Though I have never been to Hyderabad but never ever leaves a single opportunity to have it whenever Sushant visits Hyderabad. I did many trials, concerned various recipes and finally got a no fail recipe. I am sure you guys will love it too. So lets get started. 

Step by Step Video Link :


Ingredients :

For biryani masala/Powder :
  • Cinnamon sticks : 2 nos (2 inches)
  • Bay leaves : 2-3 nos
  • Black Cardamom : 2 nos (small)
  • Green Cardamom : 6-8 nos
  • Cloves : 6-8 nos
  • Whole red chillies : 4-5 nos
  • Black cumin/shah jeera : 1 tsp
  • Coriander powder : 1 tbsp
  • Homemade Garam Masala : 1 tsp (Click here for the homemade Garam masala recipe)
Rest of the ingredients :
  • Chicken on bone : 500 gms
  • Yogurt : 1/2 cup
  • Long grain Rice/basmati rice : 2 cups (Washed)
  • Ginger & garlic paste : 2 1/2 tbsps
  • Kashmiri Red chili powder : 1 tbsp
  • Fried onions : 3 medium (Click here for the Brown onions recipe)
  • Fresh Coriander : Handul (chopped)
  • Mint leaves : Handful (chopped) 
  • Saffron/kesar : 3-5 starnds
  • Milk : 1 tbsp (to soak the saffron)
  • Ghee : 2 tbsps
  • Oil : 2 tbsps
  • Salt : as per the taste
For the spice bag :
  • Muslin cloth
  • Cinnamon stick : 1
  • Bay leaves : 2
  • Green Cardamom : 2-4
  • Cloves : 2-4
  • Black pepper corns : 4-5
  • Cumin seed : 1 tsp
Method : 
  • Grind all the whole spices (mentioned for making the masala) and mix it with coriander powder and garam masala.
  • Marinate the chicken : Wash the chicken, add ginger garlic paste, yogurt, coriander & mint leaves, oil, half of the brown onions, biryani masala (the one which we ground), kashmiri mirch and salt. Coat well all the pieces and keep aside for a minimum of half an hour (longer would be better)
  • Make the spice bag by keeping all the ingredients in a muslin cloth.
  • Boil ample amount of water, put the spice bag into it with some salt. Add washed rice and cook until the rice is 70% percent done. 
  • In a heavy bottom pan, take the marinated chicken, add 3/4th of the 70% cooked rice, also add approx 3-4 tbsps of water with the rice (as shown in the video)
  • Sprinkle brown onions, garam masala, coriander and mint leaves, salt and ghee.
  • Do the second layer of rice and repeat the same process (as shown in the video)
  • Now sprinkle the saffron milk and red food colour (optional)
  • Cover the pan with an aluminum foil and then the lid.
  • Switch on the gas, keep on high for the first 5-7 minutes and as soon as the steam forms keep a heavy bottom pan below the Biryani handi/pan and turn the flame to medium to low, cook for another 7-8 minutes.
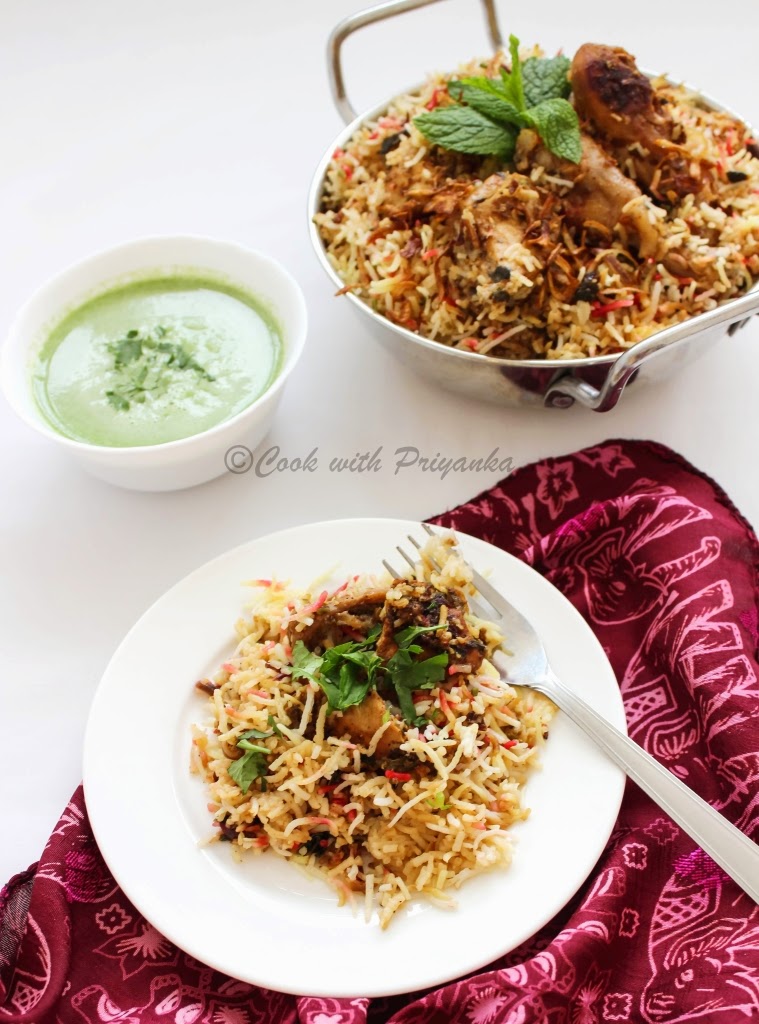
  • Once done, mix lightly with a laddle.
  • Enjoy with mint raita.
Note:
Here in London, chicken takes less time to cook as compared to India. Hence you can always adjust the cooking time as per the chicken.
Please do share your experiences and feedback with me in the below section of comments or on my Facebook page. I too have a You Tube channel please do visit for all the video recipes. All the links mentioned below :) 
Facebook : https://www.facebook.com/cookwithpriyanka

Thanks and Happy Biryani making!
Priyanka


Sunday 17 August 2014

Panchmewa Pag (Dry fruits fudge) : Krishna Janmastami Special


Hello everyone, today I will be showing you all, how to prepare Panchmewa Pag or dry fruits burfi. This goes as a bhog to Laddogopal (Krishna Bhagwan) on the occasion of Janmashtami. Janmashtami is on one of the very important festival in our house. During my childhood we used to decorate the entire house with balloons and other stuff. Mummy used to prepare various Prasad items like Panjeeri, Charnamrit and Pag. After Marriage I too celebrate it every year and make prasad like my mom does. 


As the name says, Panchmewa Pag is prepared with five types of dry fruits like dried coconut, Fox nut or Makhana, Charoli or Chironji, Green raisins and Melon seeds. But being in London, I usually don't get many things easily. Hence I make it on my own way since few years and it tastes amazingly good. Its a quick recipe and can be stored for 15-20 days in an air tight container. So lets quickly run through the ingredients following the method.

Video Link :

Ingredients :
  • Dried coconut shredded : 2 cups
  • Green Raisins : 3/4 cup
  • Chopped Walnuts : 3/4 cup
  • Chopped Almond : 3/4 cup
  • Chopped Pistachios : 3/4 cup
  • Sugar :1 & 1/2 cups 
  • Water : 3/4 cup
  • Green cardamom : 3-4 pods crushed
Method :
  • In a pan take sugar and water, heat the mixture and continuously stir unless sugar is dissolved.
  • Once dissolved, let is cook unless you get single thread consistency. I have shown in the video that how to check for one thread consistency.
  • Once you get it, add the dry fruits and give a quick mix and turn off the gas.
  • Transfer the mixture on to a greased plate or in a tin as shown in the video. Level it a bit and let it sit for half an hour.
  • Once set, cut it into desired shapes and your prasad is ready :)

Notes :
  • You can take any dryfruits of your choice or on your availability.
  • While making syrup one thread consitensy is very important, otherwise your pag will not set.
  • If not set, no need to worry, put your mixture again in the pan, heat up and again set.

Please do share your experiences and feedback with me in the below section of comments or on my Facebook page. I too have a You Tube channel please do visit for all the video recipes. All the links mentioned below :) 
Facebook : https://www.facebook.com/cookwithpriyanka

Thanks and Happy Janmashtami!
Priyanka

Friday 15 August 2014

Tiranga Bread : Independence day special


Hello everyone, wish you all a very Happy Independence day. Being a kid 15th August has always been the most awaited days of my school life because of the candies and sweets which I used to get from my teachers.
However as I grew up, I understand the true meaning and importance of this day and the reason behind why its considered to be a Red Letter Day in the Indian history. This post is my sincere tribute to all the people who contributed in giving us this Nation as a free space to live.


Further to this, an Independence day event was organized by one of my very good friends Ms. Chitra Haldia @ Chef At Large. It was a wonderful event, people participated with full enthusiasm and patriotism. Tiranga bread is my contribution to that event and was very well appreciated there. I am sharing this recipe with you all too.


Ingredients :
  • All purpose flour/Maida : 3 cups and 2 tbsps to dust
  • Dry Active Yeast : 2 and 1/4 tsps or 8 gms
  • Salt : 1/2 tsp
  • Sugar : 2 tbsps
  • Butter : 2 tbsps
  • Luke warm water : 1 and 1/4 cup
  • Food colours : Saffron and Green
  • Oil : to grease the pan and brush the loaf

Method :
Activate the yeast :
  • In a bowl take luke warm water. To this add yeast and sugar,  mix well, cover and keep aside for 10-15 minutes or unless yeast becomes foamy or frothy.
  • If you are using Instant yeast, then skip this step and add yeast, sugar and salt directly to the flour and knead with luke warm water. 
Make the dough :
  • Once yeast activated, take All purpose flour, add salt , mix well, add yeast mixture and butter. Try to knead a sticky dough.
  • Take dough on to the working surface and divide it into three equal parts. Mix few drops of saffron colour on the first part and knead for 10 minutes or unless you get a smooth dough with uniform colour. Once done keep it in a well greased bowl, apply some oil on the top and cover it loosely with cling film or a wet towel. Keep it in some warm place and wait till it doubles in size. It might take 1-2 hours depending on the weather. 
  • Similarly repeat the process with the next two parts. Just apply green colour on the one and no colour on the third part. You might need some dry flour and butter to make it smooth. But don't add a lot of dry flour or it will become dense.
  • Once doubled, punch them a little to remove the excess air and try to form 3 flat rectangles (as per the size of your bread tin), from all the three parts. You can use a rolling pin if you want, i did it with my fingers.
  • Apply some water on the top of green part and some water on the base of white part, stick them together and lightly pat them so that they stick to each other nicely.
  • Repeat the process with white and saffron. 
  • In this way you will get a stack of three colours. Put this into a well greased bread tin, also brush it with some oil.
  • Cover it loosely with kitchen towel and let it rise again until doubled in size.
  • Once done, put it in a preheated oven at 190° Celsius for 30 minutes. 
  • To check whether the bread is done or not, just tap on the top of your bread and you will hear hollow sound, this is the indication that you bread is done. 
  • Keep the tin on cooling rack and after 5 minutes demold the bread.
  • Let it completely cool for and then slice it. After slicing you will see all the three colours.
Enjoy!  

Note :
You can make this bread with any colour of your choice like Rainbow bread or Omber bread.
Stick the three layers nicely and don't leave them loose.
Let the bread completely cool before slicing otherwise you won't get clean slices.

Please do share your experiences and feedback with me in the below section of comments or on my Facebook page. I too have a You Tube channel please do visit for all the video recipes. All the links mentioned below :) 
Facebook : https://www.facebook.com/cookwithpriyanka

Thanks and Enjoy Baking!
Priyanka


Thursday 7 August 2014

Chocolate & Nuts Fudge


Hello everyone, I am pretty sure that you guys must be doing all various preparations for this Rakshabandhan. So why not give it a try for some Videshi mithai this time ?


I always try to keep my recipes simple, easy and quick, so just made these gooey Chocolate & Nuts fudge in microwave, very quick, simple and delicious. Won't take much of your time, so enjoy and just eat these heavenly cubes. I made them with just three ingredients only, so no more rush to superstores even :)))
I have an another reason to make these, just completed my 1000 subscribers on YouTube channel, super happy :). Thanks to you all for reading, watching and supporting me to this level. Love you all.

Video Link -
 
 
Ingredients :
  • Good quality Dark chocolate : 200 gms ( I used 60% cocoa one)
  • Condensed Milk : 150 ml (Adjust as per the taste) For homemade Condensed Milk recipe click here
  • Nuts of your choice : 1 cup (I used walnuts, almonds & raisins) 

Method :
  • In a microwave safe bowl keep the broken chocolate pieces and microwave for 1.5 minutes. Please do stir after every 30 sec as the chocolate have a tendency to burn very fast.
  • Also warm up the condensed milk for 1-2 minutes.
  • Mix all the ingredients, including nuts.
  • Pop it into a tin lined with butter paper as shown in the video.
  • Keep it into the fridge for 1 hour.
  • Take it out and cut it into desired shape.
Note :
  • You can use aluminum foil instead of butter paper.
  • You can use double boiler for melting chocolate and warming up the condensed milk.
Please do share your experiences and feedback with me in the below section of comments or on my Facebook page. I too have a You Tube channel please do visit for all the video recipes. All the links mentioned below :)
YouTube : https://www.youtube.com/user/cookwithpriyanka
Facebook : https://www.facebook.com/cookwithpriyanka
Enjoy!

Thanks & Happy Fudge making
Priyanka


Tuesday 5 August 2014

Garlicky Mushroom fried rice

Hello everyone, today I have got you all a recipe of Garlicky Mushroom fried rice. A super duper easy and adaptable recipe. No compulsion with the veggies, you can always put up the recipes of your own choice. A very good option to use the leftover rice and a perfect meal for kids lunch box too. As far as the flavours are concerned, garlic and mushrooms goes very well together, so lets quickly run through the ingredients following the method :)

Video Link :

Ingredients :
  • Rice - 1 cup (boiled & cooled)
  • Mushrooms : 1 & 1/2 cups (chopped)
  • Onions : 1 medium (chopped)
  • Garlic : 1 tbsp (chopped)
  • Carrots :  1/4 cup (chopped)
  • Coloured Bell peppers : 1/4 cup (chopped)
  • Cooked Corns: 2-3 tbsps
  • Black pepper : 1 tsp
  • Chili flakes : 1 tsp (optional)
  • Salt : as per the taste
  • Spring Onions : A handful
  • Oil : 1 & 1/2 tbsps
  • Tomato ketchup : 1 tbsp
  • Dark Soya sauce : a dash
  • White vinegar : 1 tsp
Method :
  • Heat oil in a pan, add garlic, brown it a bit and then add onions. After a minute add carrots and saute it for couple of minutes.
  • Now add Mushrooms, bell peppers and corns. Mix well and also add seasoning (black pepper, chili flakes & salt), cook it for another couple of minutes or unless the mushroom's moisture dries out.
  • Once done, add rice and lightly mix. Add ketchup, soya sauce and vinegar, mix well and its ready :)
Enjoy!

Note :
  • Try to prepare the rice a day before and then use it. In this way the rice won't stick neither it will brake.
  • You can make it with the veggies of your own choice.
Please do share your experiences and feedback with me in the below section of comments or on my Facebook page. I too have a You Tube channel please do visit for all the video recipes. All the links mentioned below :)
YouTube : https://www.youtube.com/user/cookwithpriyanka
Facebook : https://www.facebook.com/cookwithpriyanka

Thanks and Enjoy cooking
Priyanka :)


Friday 1 August 2014

Mango Kalakand (Quick recipe)

Hello everyone, Rakshabandhan is round the corner, so lets prepare some homemade sweets for our brothers and take lot many gifts from them :)))) 


Kalakand is a very well know sweet by all of us. If we are going to follow the authentic recipe, it will take lots of time, but I have got you all a very easy, simple and quick recipe. I have flavoured it with mangoes and hence it will be Mango Kalakand. You can flavour it with only Cardamom or Kesar or may be strawberries or why not pineapple? Various options for you, only the basic recipe will be same. So lets quickly run through the ingredients following the method :)

Video Link :

Ingredients :
Method :
  • In a heavy bottom pan heat mango pulp for a 3-4 minutes. Once started reducing, add condensed milk and paneer and mix well. 
  • Cook it unless the water content is reduced and it starts leaving sides of the pan. Please refer video for the perfect consistency.
  • Once done, add cardamom powder, mix and take it out on a greased plate or a board.
  • Try to form a 1/2" log, apply the pistachios and let it completely cool.
  • Once cooled, cut it into desired shape and serve :)
Enjoy and have fun :)
Happy Rakshabandhan

 
Please do share your experiences and feedback with me in the below section of comments or on my Facebook page. I too have a You Tube channel please do visit for all the video recipes. All the links mentioned below :) 


Facebook : https://www.facebook.com/cookwithpriyanka

Thanks and Enjoy cooking
Priyanka :)